
In the 21st Century, we have the technology to make the most tedious task effortless. Anything from preparing food to learning about new machines is just one google search away. On the other hand, we had the legacy of woodworking in the past; artisans work long hours to create irresistible designs on the chairs.
Sometimes, instead of taking back from our past- we can give something back to it, such as restoring a rocking chair. In this article, we have come out with a step-by-step procedure to recover your old rocking chair.
The process can vary for different rocking chairs, but most of the techniques explained below would be relevant to you.
Steps to Recover Your Old Rocking Chair:
Follow along as we give a brand new look to your rocking chair:
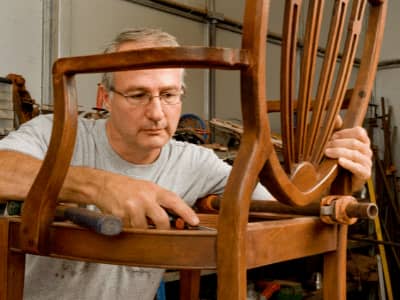
1. Cleaning and removing the old parts:
The first step is to clean the old rocking chair. Just do basic cleaning of the chair because, at the later stages, we’ll restore its original color. Now remove the old and broken pieces of the chair. This step can vary from the condition of the chair.
Some of the chairs have a damaged back, whereas the others have broken tendons. Just remove whatever part of the chair is broken. Also, don’t forget to remove the nails in the chair.

2. Repairing the damaged back:
A. Finding the material for the new back
As we have removed the back, find the necessary material to repair the old back. The first thing you need is foam pieces. The pieces can be old or new. We have recommended both because the foam pieces will not be visible on the chair as the fabric will cover it up.
Make sure that the details are stain-free. There is a likelihood that the stains would be visible if you are using a very light color fabric. The second thing you need is padding. It is not very expensive, and you need hardly one to two square feet of padding for the chair.
The third and last thing you need is soft and beautiful fabric. You can buy any fabric for the chair based on your preference. There is a need to purchase some materials you need during the procedure, such as paints, hot glue, trims, upholstery, and staples machine.
B. Preparing a new back structure:
Please measure the size of the back and note it down on paper. Then place the foam pieces on a wooden table and put the padding on it. Then place the new fabric piece over it. It will be like a three-layer structure.
Then give it a proper shape by cropping the unnecessary part. Use the details noted down by you and cut this three-layered structure in the actual size of your back.
C. Fold corners and staple them.
The three layers structure is not joined yet, so now we have to join it. Fold the corners and staple them. Make sure that the stapling is done by attaching all the layers. Any part which is left unstapled will damage the whole structure of the back.
D. Painting the rocking chair structure
We need not only to restore the rocking chair but also to give it a new look to paint it. You can use any paint for the chair for this purpose. Most of the old rocking chairs use latex paint or oil-based paint. You can pick the color of your choice for this purpose.
Spray or use a brush to paint the rocking chair, but also make sure your hands or clothes don’t get painted, particularly in spray paint. Allow the color to get dry, and meanwhile, we can get back to the back.
E. Attach the newly made back structure:
The new back structure is ready to be fixed on the old back. But before that, we need to attach another layer to the back. The further back will be attached to this fabric—staple a fabric piece of the same length as that of the chair.
The staple should be done on the top, back, and sideways. Now is the time to attach upholstery webbing to the back. Upholstery webbing is a solid woven fabric used in couches and chairs.
Upholstery webbing should be attached in a criss-cross form. It increases the strength and longevity of the chair. You can check this video to learn about connecting traditional upholstery. Now attach the three-layered back structure to the chair by stapling it. Again the edges should be folded before pinning it.
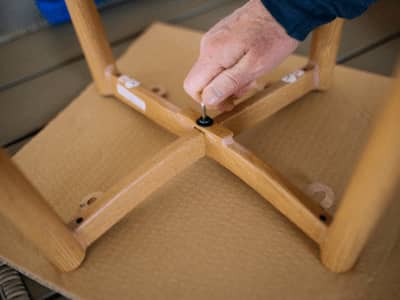
3. Repair the broken spindles
The broken tendons should be separated from the chair. The surface of the spindles is damaged, so we need to use a Japanese pole saw to cut and trim the damaged parts. Now, make a hole in the spindles from where it is damaged and insert a new piece of wood of the same shape as the old trimmed spindle.
It would help if you used the super glue to insert the new tendon into the spindle.
4. Shape the new spindle
The new spindle may not look like the old one as the shape and design may not be the same. Also, the new tendon may not be as smooth as the old one. For this purpose, smooth the shape of the new spindle using sandpaper or belt sander.
Some people use the T-tracker machine for this purpose. But T-tracker machine, you need to have the T-tracker machine first. Also, we don’t recommend a T-tracker machine because it will increase the cost of repairing.
Again it would help if you used hot glue to attach the new spindles to the chair. Make sure that everything fits perfectly in its place. Please don’t use the chair right after repairing but give it at least 5 6 hours.
That’s it; your job is done. Now you can restore the chair to its place. Please place it in your living room or your study room.